(Please click on image for a higher
resolution view)
Steps for fine tuning:
Color correction using the "Selective Color" layer.
1. Reselect the previously feathered region: "Select,
Reselect".
2. Open the Selective Color adjustment layer ("Layer, New
Adjustment Layer, Selective Color").
3. Adjust to taste.
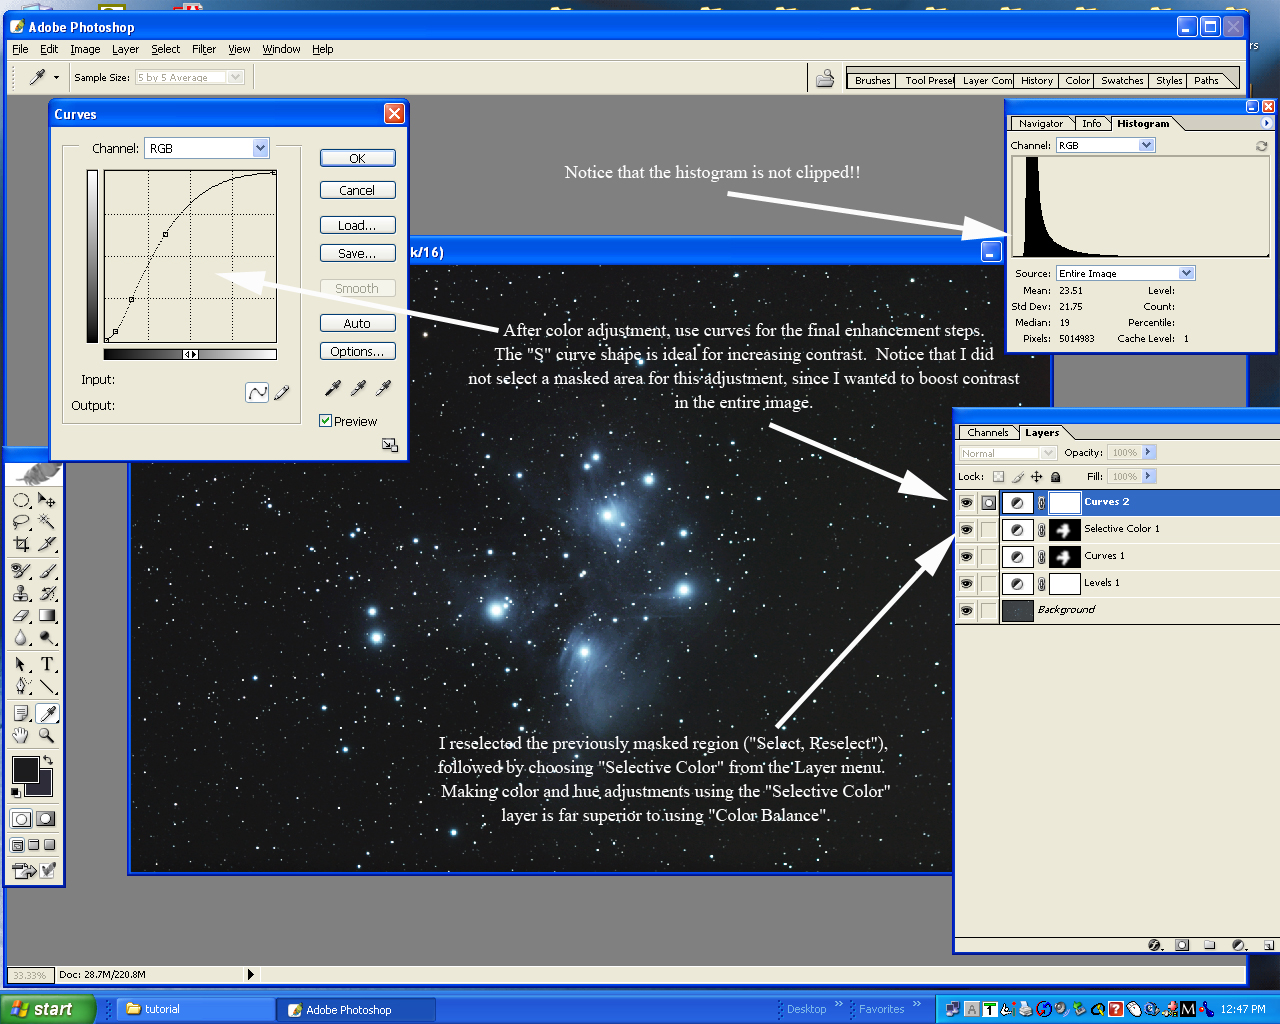
Steps for fine tuning:
Global curves adjustment. Now
it is time to make a final curves adjustment to increase contrast in
the entire image. This adjustment is meant to address the regions
that we did not select with the lasso tool earlier, but it is also
designed to further enhance the Pleiades region itself. No mask
will be used.
1. Open Curves: ("Layer,
New Adjustment Layer, Curves").
2. Adjust as shown in curves window above.
Final thoughts:
1. Basic sequence (after
obtaining the raw, stacked image): Curves stretch (for initial
"Raw" format Canon 10D/300D images); Correction of uneven lighting
(e.g., vignetting); Levels adjustment (for shadows and highlights set
point); Curves adjustment (most important tool for image processing),
with or without masking certain regions.
2.
Do not clip the histogram.
3. The use of unsharp masking is fine, but do not overdo it, and
only use as one of the final steps in image processing (so as to avoid
artifacts).
4. Notice that I did not perform smoothing in the above example
(using a program such as NeatImage, for instance). However,
smoothing may be especially useful when applied selectively to the
noisiest channel (like red in emission nebulae). It is important
to avoid oversmoothing, which will result in serious loss of detail.
You have all seen astrophotos that look like they were made out
of wax and
then partially melted in the heat- this is largely the result of overly
aggressive smoothing. In fact, I generally push the image until I
see
a little grain (just a little)- I've found that this allows me to
capture
as much detail as possible.
I've tried to address the most common questions that I receive
regarding basic image processing of astrophotos. Please consult
with other references, including those in the Links section.
I hope that this tutorial enhances your astrophotography
experience and makes this great hobby even more enjoyable.
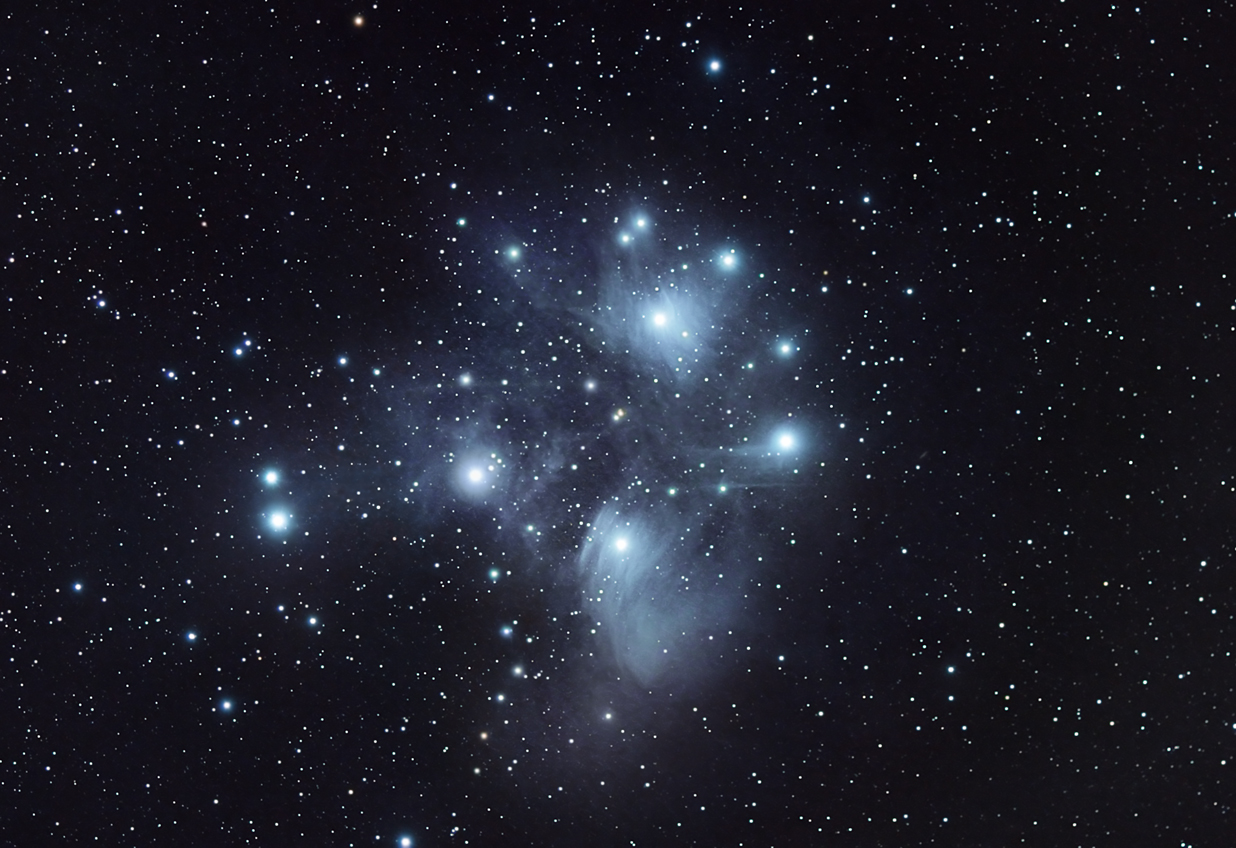
Final Result
(after a few more steps):
(Please click on image for a higher
resolution view)