Once
you
have stretched the initial raw converted file, corrected vignetting,
and
adjusted the shadows and highlights using Levels, you are now ready to
see your image come to life through the use of Curves. For some
targets
like the Pleiades, it is useful to selectively apply curves to only one
portion of the image, which gives you the flexibility to make
adjustments
where they are needed most, without affecting (oftentimes adversely)
other
regions of the image. For other targets, this strategy is not
necessary.
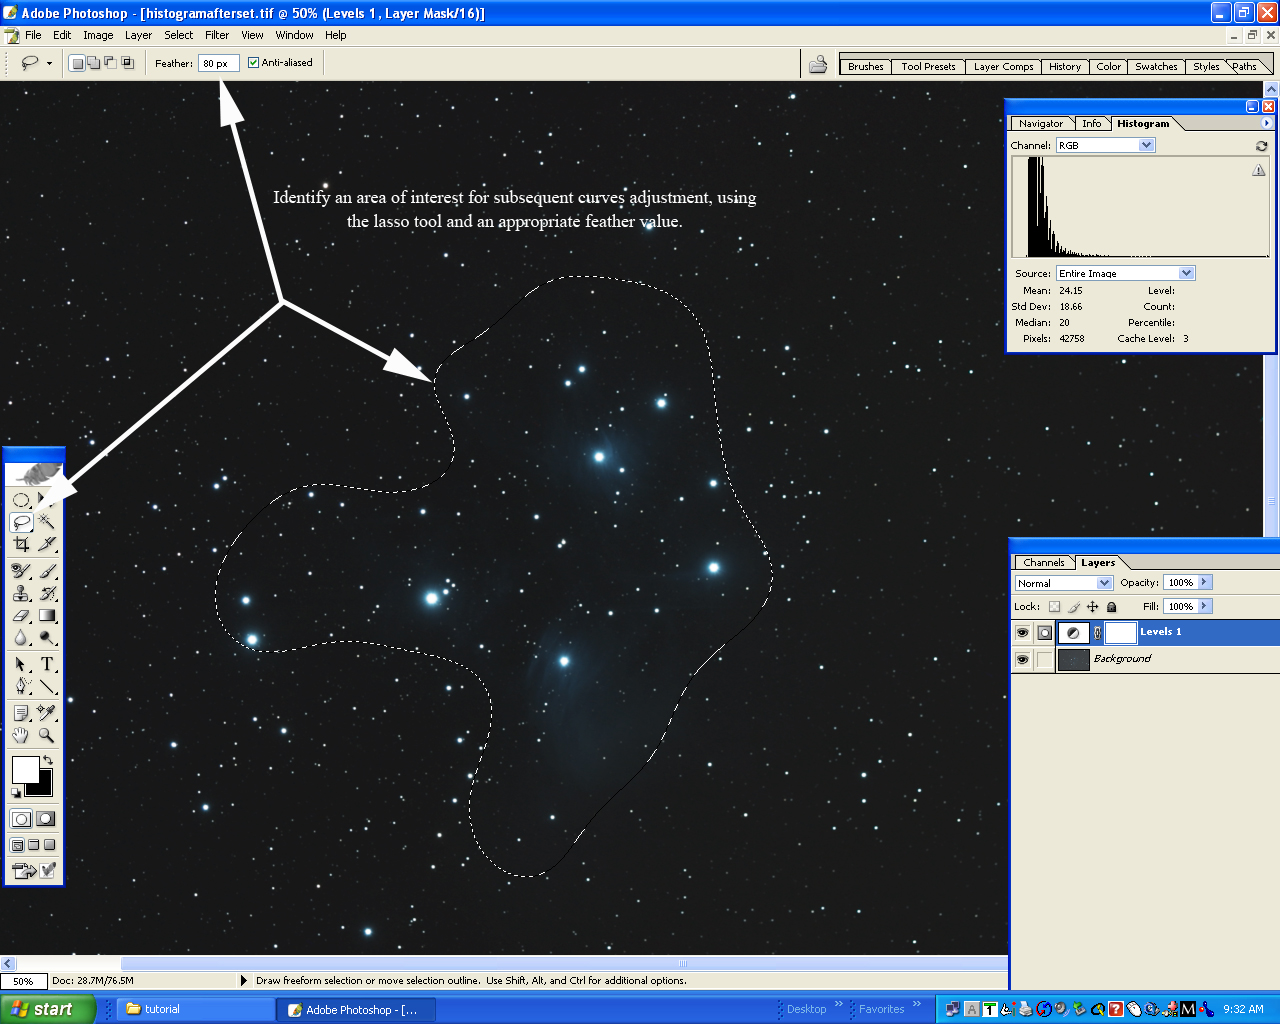
In this step, we will use the lasso tool with a feather to select
an area that will be adjusted by curves:
(Please click on image for a higher
resolution view)
Steps for selecting the area of
interest:
1. Use the lasso tool, with the feather function set to about 80
pixels (this will vary; see higher resolution version of above photo
for details), and encircle the area of interest as shown.
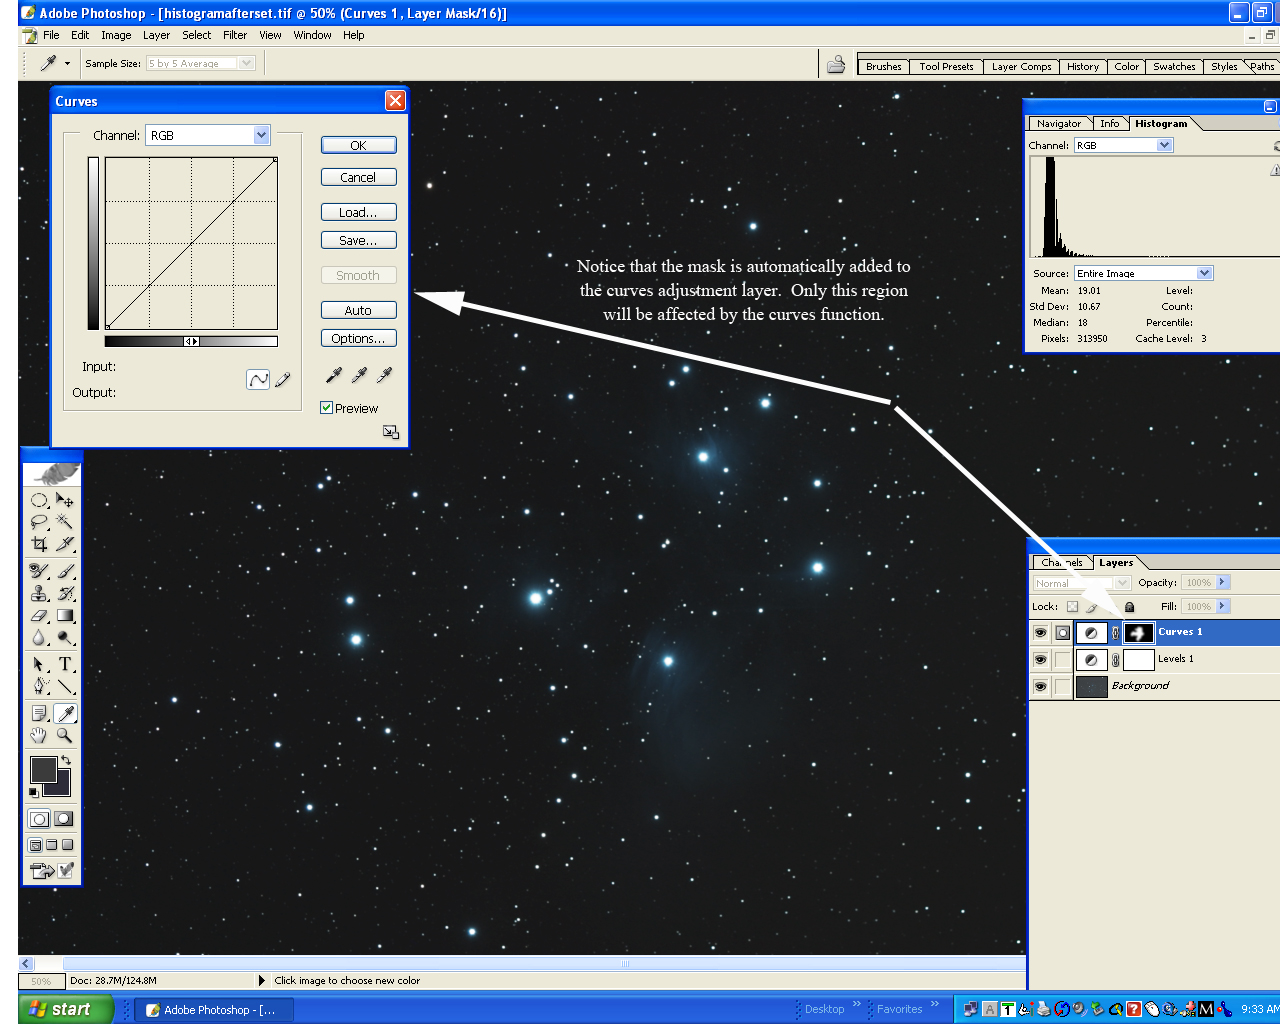
2. Leaving the selected area visible, select Curves ("Layers, New
Adjusment Layer, Curves"). Now your window should look like this:
(Please click on image for a higher
resolution view)
3. Notice that the selected boundary is no longer visible.
But if you look at the Curves layer (to the right), you will
see it appear in the form of a mask. This is the beauty of using
masks in Photoshop- any changes that you make in the Curves graph will
affect only this area of interest!
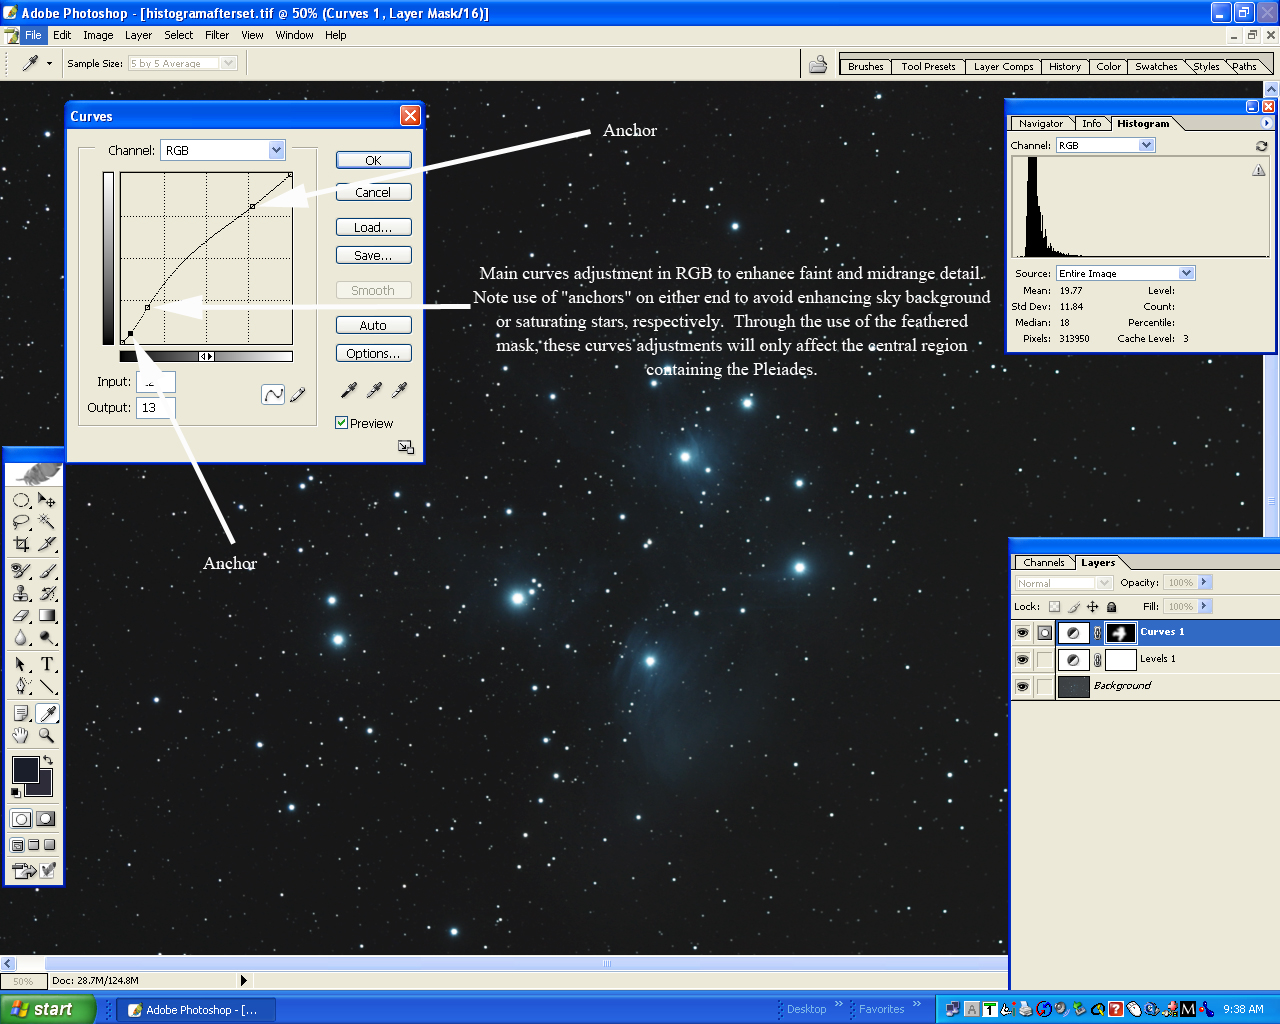
4. Adjust Curves as shown below (notice use of "anchors"):
(Please click on image for a higher
resolution view)
5.
Optional- At this point you could also use curves to
selectively boost the midrange of the blue channel, enhancing the
nebulosity
somewhat. I will oftentimes adjust the Red channel selectively
for
emission nebula targets, making a small curves adjustment in RGB as a
last
step. There are many ways to use curves, but some combination of
adjusting
the RGB curve, but also selectively tweaking the individual channels,
is
best.