In
many ways, this is the most important step of image processing, and yet
it is not always done correctly. The purpose of this step is to
adjust the highlights (white point) and shadows (dark point) in order
to maximize the dynamic range, but without clipping either end (which
will result in a loss of valuable data). This is especially
important for the shadows end of the histogram, where the faint pixels
need to
be enhanced, not thrown out! We work so hard to capture faint
detail during an imaging session, and yet this detail is often lost due
to
improper setting of levels.
(Please click on image for a higher
resolution view)
Steps for adjusting the highlights:
1. Transfer the image back into Photoshop (after vignetting
correction in ImagesPlus).
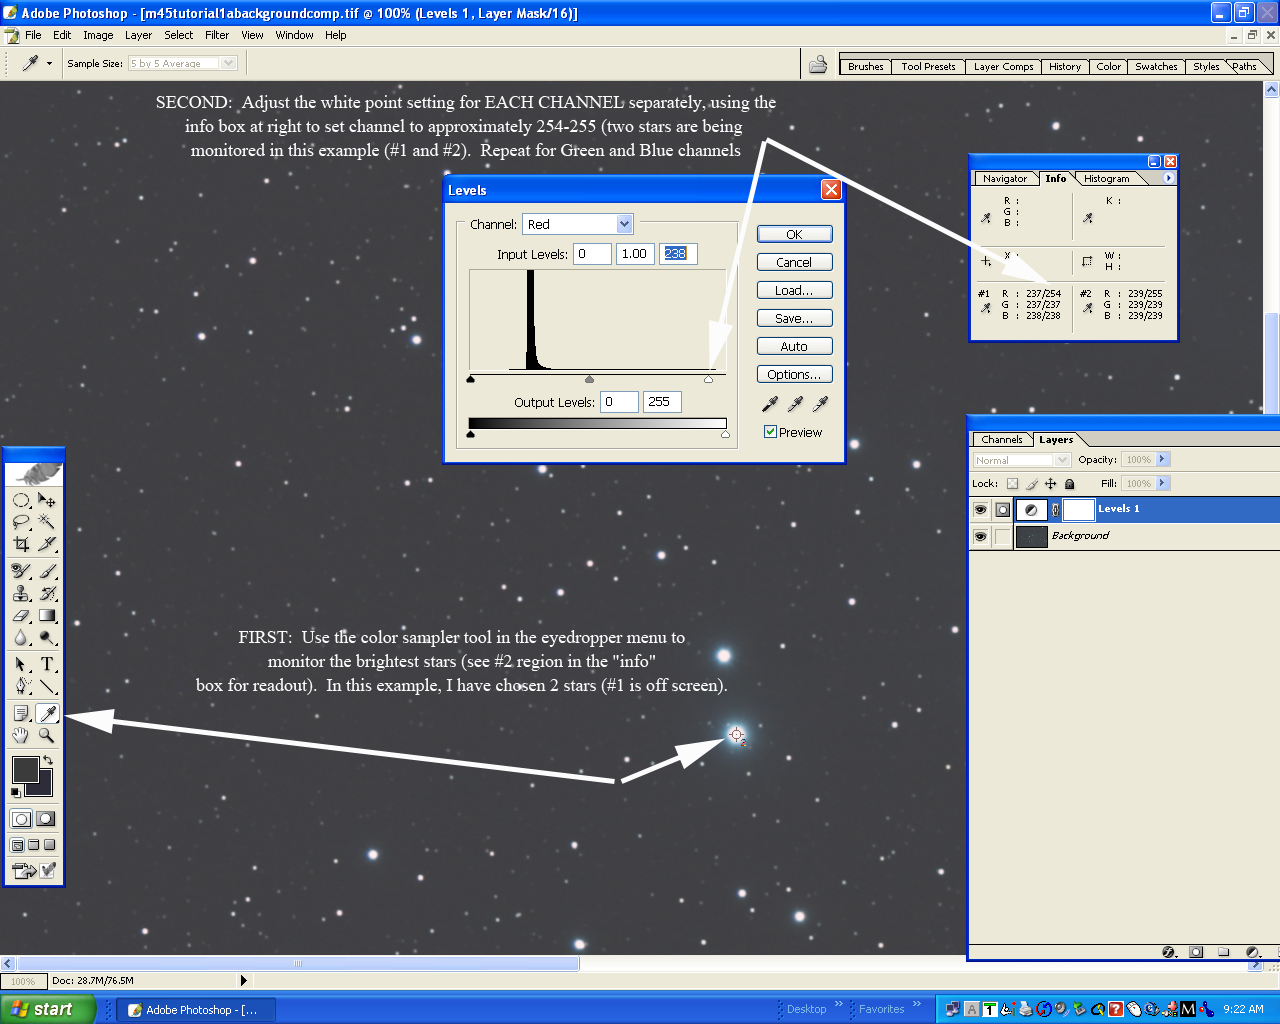
2. Once you have identified the brightest star (you could use the
"threshold" function for this), the idea is to monitor the pixel
intensity of each channel (R, G, B) to reassign the values to 255, 255,
and 255 respectively (i.e., white).
3. Use the "Color Sampler Tool" in the eyedropper menu to select
one or two of the brightest stars for monitoring. I suggest
enlarging the photograph for this step, and also using a 5x5 sample
area (click on the above photo for details), to permit more accurate
sampling. Notice the #2 target area in the photo, overlying a
star. There is a corresponding section in the "Info" box to the
upper right that provides a read-out of the pixel intensity in this
area.
4. Now, open a Levels layer- "Layer, New Adjustment
Layer, Levels." For each channel, move the white point cursor
(the one on the right) towards the left, while monitoring the Info
box, until the pixel value of the chosen star (#2 in this example)
reads
254-255.
5. Repeat for the Green and Blue channels.
6. You have just set the white point, without clipping the
highlights!
7. To remove the Color Sampler Tool circle, press the Alt key
(Windows) and hold the cursor ovcr the region- it will morph into a
scissors. Click on the image once this happens, and the Color
Sampler Tool circle will disappear.
Step 5- Levels Adjustment- Shadows:
Clipping
the shadows end is almost never
a good idea for astrophotography of objects like nebulae, where we
are interested in capturing faint detail. We work hard to capture
those faint photons, and we should strive to preserve and enhance them
to obtain the best image possible. Ever notice how some
astrophotos have a stark black sky background, with nebulae that have a
"cookie cutter"
contour with an abrupt border that looks artificial? In these
instances,
the histogram has almost certainly been clipped, with loss of faint
nebulosity
on the periphery of the nebula. For relatively bright and
well-defined
objects like galaxies or even bright star clusters, a minor amount of
shadows
clipping is sometimes permissible in order to obtain a dark
background
sky (in this instance there is generally no loss of important data,
since
most of the detail within the galaxy is relatively bright and therefore
far removed from the left side of the histogram).
(Please
click on image for a higher resolution view)
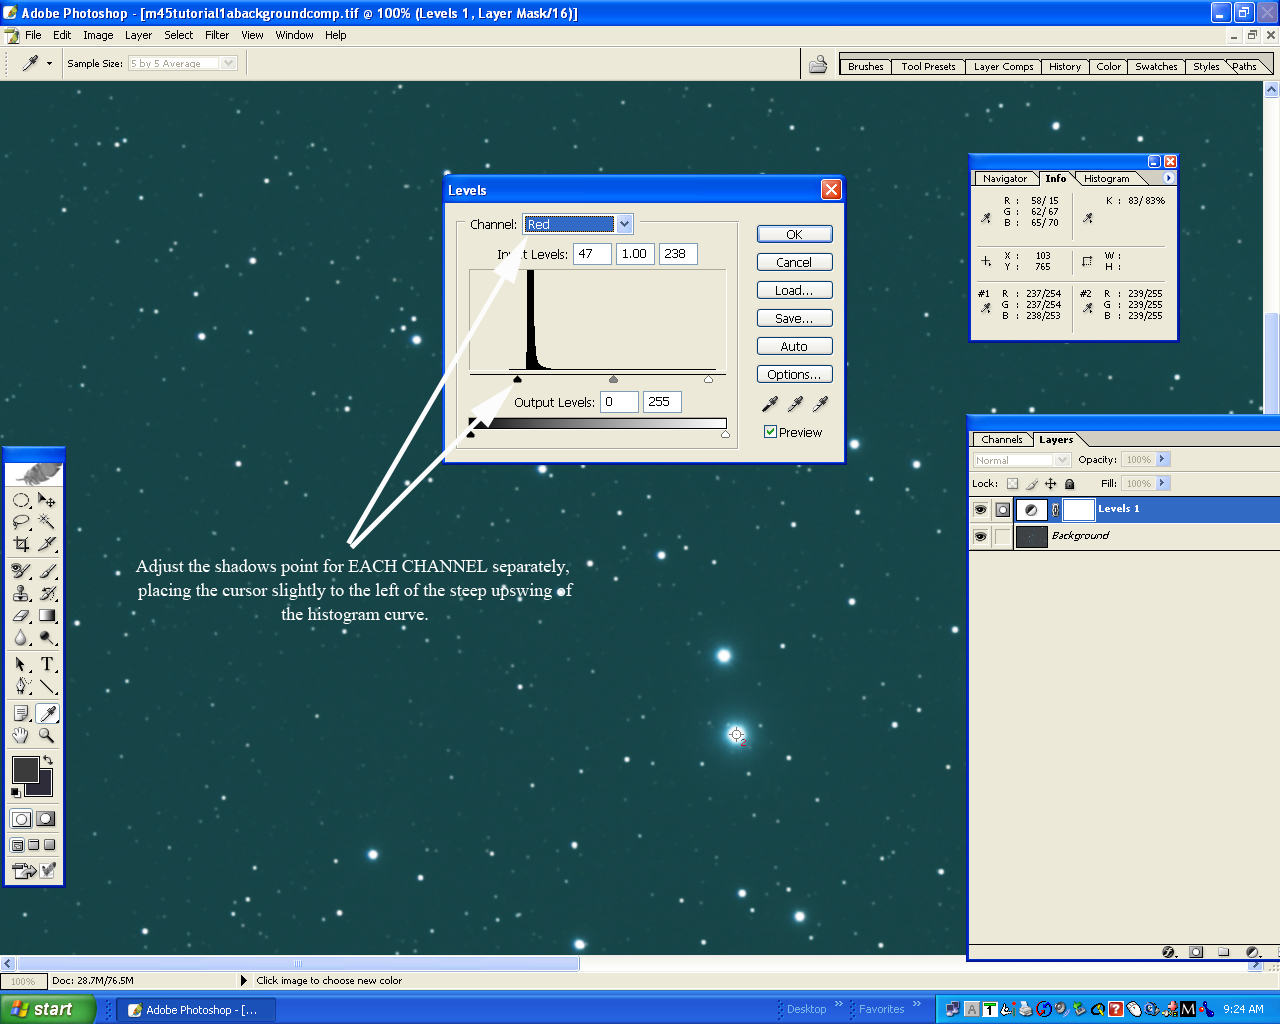
Steps for adjusting the shadows:
1. Open the same Levels layer that you created in Step 4, select
the red channel, and move the shadows cursor (the one the left) towards
the right so that it is positioned just before the abrupt rise in the
histogram. Notice how the image becomes "discolored." This
will be corrected once all of the channels have had their
shadows point adjusted.
2. Repeat for the Green and Blue channels.
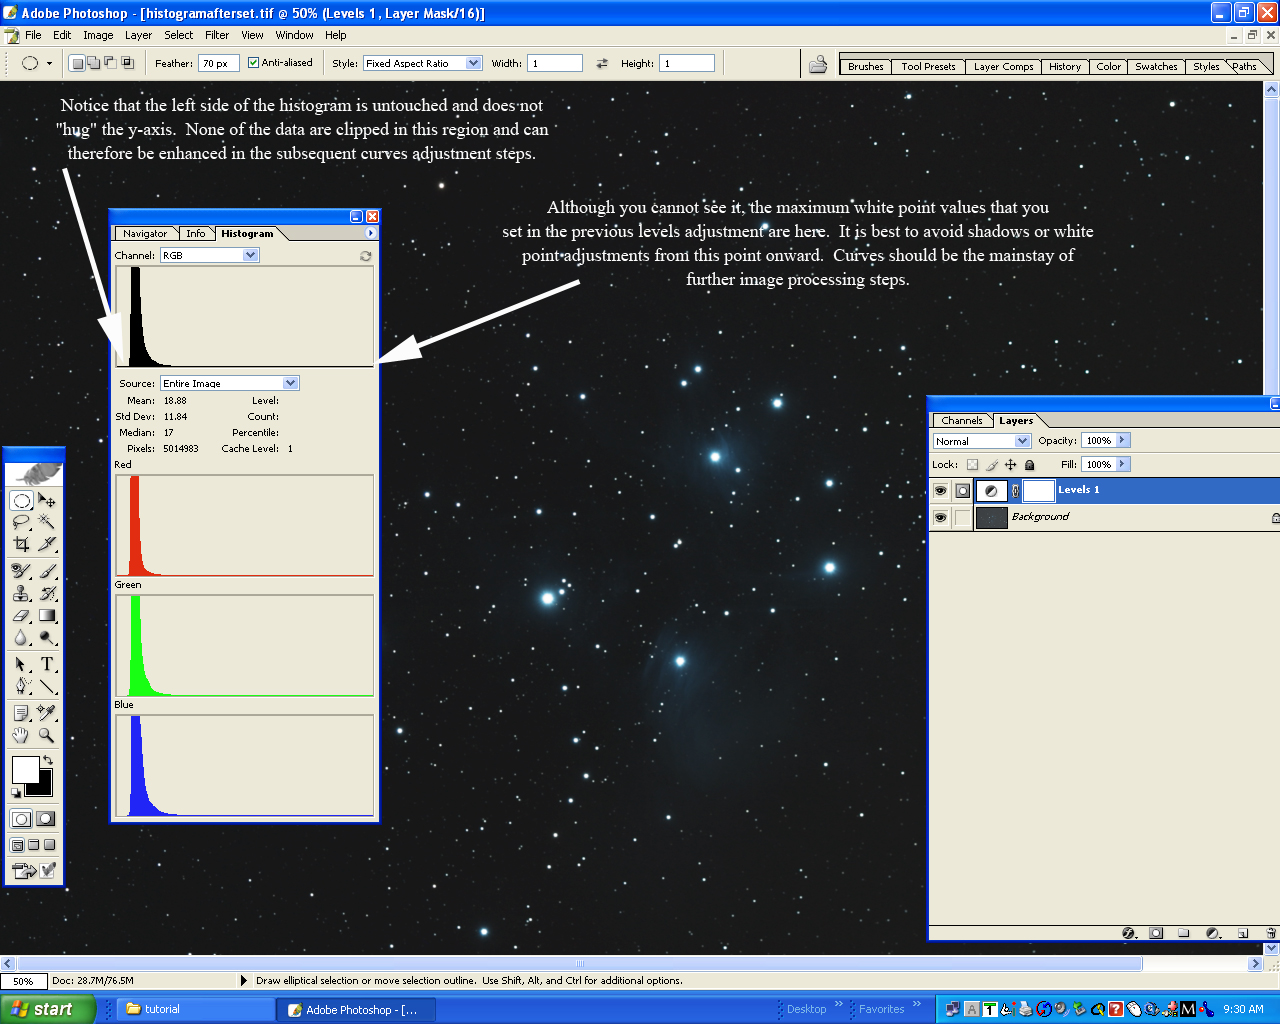
3. You have just set the shadows point, without clipping faint
detail. If you move the shadows cursor too much to the
right, you will "clip" the faint pixels, meaning that they will be
reassigned to values close to 0, 0, 0 (black). If you clip the
shadows, the
histogram will "hug" the y-axis (BAD), instead of starting with an
upward
slope (GOOD). Here's a quick test you can try on some of your
older
images: If you examine the pixel levels in the background sky
(using
the eyedropper tool and watching the "Info" section for the values) and
see
lots of 0's and 1's for R, G, B values, you've probably clipped the
shadows
end. Your sky background may initially look pleasing to you, but
you will not (or should not) be satisfied with the final result.
Once you clip the data, it cannot be recovered!
Here
is the final result of Levels adjustment:
(Please click on image for a higher
resolution view)