 Modified
Bicolor
Technique for combining Ha and OIII images
Modified
Bicolor
Technique for combining Ha and OIII images
Please note:
As described below, I have made two modifications to the original
bicolor technique. As before, the bicolor method creates a
synthetic green channel, but the following modifications affect the way
that each channel is colorized:
1)
Instead of using "lighten" mode for the OIII (blue channel) layer, use
"screen" mode.
2) Instead of using the "Color Balance" adjustment
layer, use the "Hue/Saturation" layer as a clipping mask in colorized
mode. This
strategy was developed by Travis
Rector and is more fully described by
Ken Crawford (download Ken's step-by-step procedure here).
Introduction:
Narrowband
filters such as those that pass SII, Ha, and OIII light
permit moonlight imaging of supernova remnants, planetary nebulae, and
several diffuse nebulae (such as IC1805, M16,
IC1396, etc.). Combining images from narrowband
filters is often done using the Hubble
tricolor palette, in which SII, Ha, and OIII are assigned to R, G, and
B,
respectively. Another technique adopted by the
Canadian-France-Hawaii Telescope team (CFHT) is the sequence Ha, OIII,
and SII (for R, G, B, respectively). With either of these
techniques, the resulting image is portrayed in "false color" and takes
some getting used to. In addition, star colors are not
well-preserved, and many images using the Hubble palette are
characterized by red halos that are the result of greater bloating of
stars with the SII filter (partly due to the need for increased
stretching of this channel).
I have developed a processing method that only requires data
from Ha
and OIII filters, in an attempt to 1) decrease the amount of
imaging time necessary for each target, 2) produce a more "realistic"
looking color image, and 3) still preserve some of the unique
appearance of narrowband imaging. The technique described below
accomplishes these goals by creating a novel
synthetic green
channel ("sG"), by using data from Ha and OIII. I refer to the
final color composite as Ha:sG:OIII. The colors
are pleasing and are representative of Ha (red) and OIII (blue),
ionization fronts are yellow, and the stars do not have halos (although
they are
relatively colorless, which is a characteristic of this
technique). The technique may also be applied to conventional Red
and Blue broadband images, such as those derived from the Digitized Sky
Survey (DSS). Please click here to view DSS
images that I've processed with the bicolor technique.
Brief
overview:
Ha is used for the R channel, and OIII is used for the B channel.
The synthetic green channel is created by multiplying the OIII layer
with the Ha layer. Construction of the color composite is done
using the layer method in Photoshop CS and should be followed exactly
as
described for best results.
Method
(please click on the indicated links for an illustration of the steps):
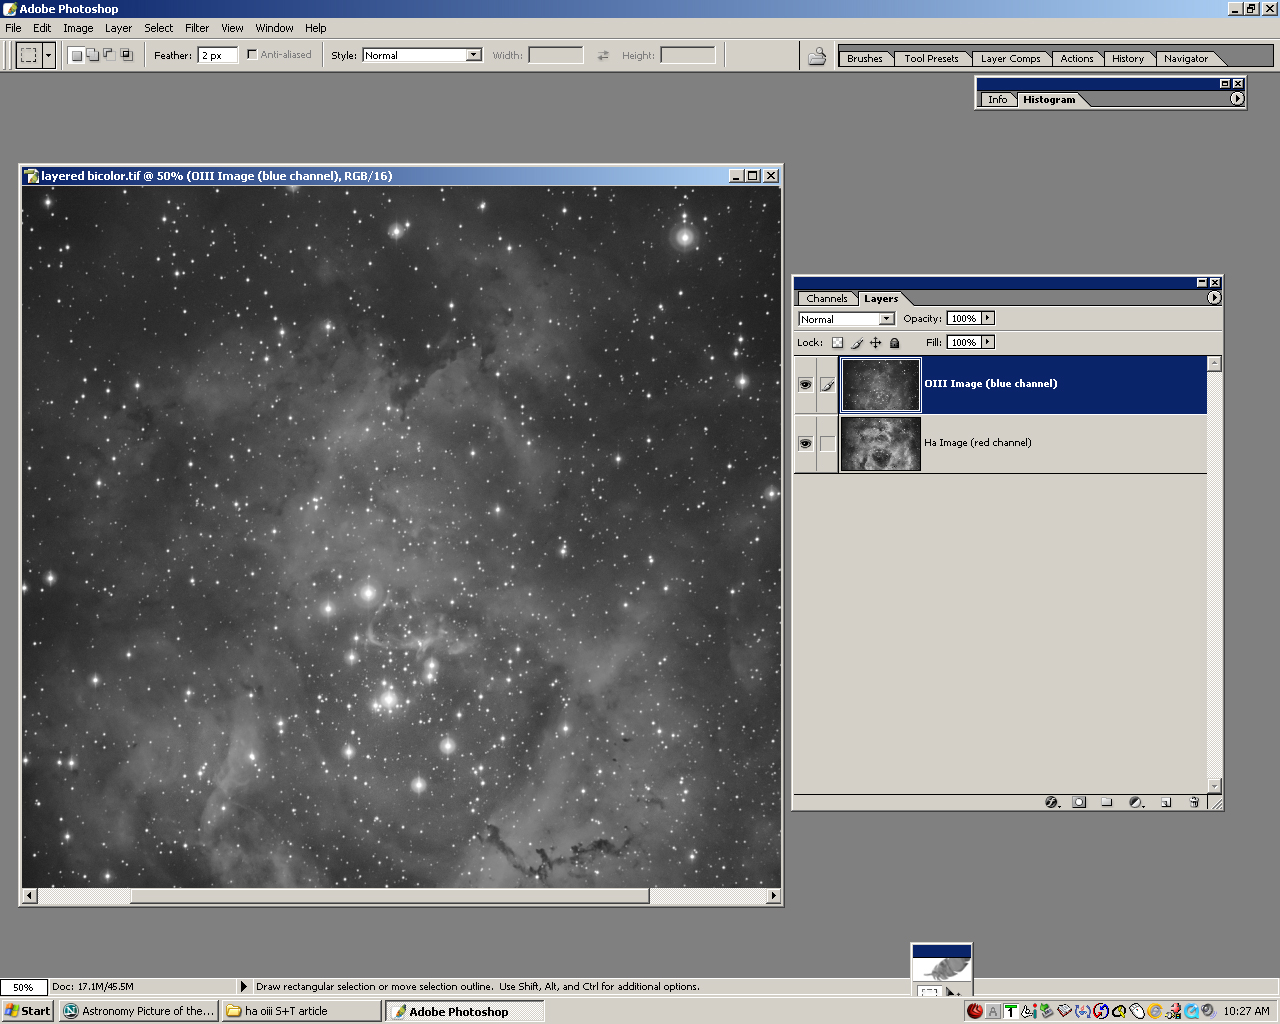
1. Obtain your
best
Ha and OIII
images in
the usual manner. Process as usual.
2. Layer the
images as shown
here.
Label as indicated.
3. Change the
Mode to RGB (i.e., "Image, Mode, RGB Color").
When prompted, choose "Don't Merge"!
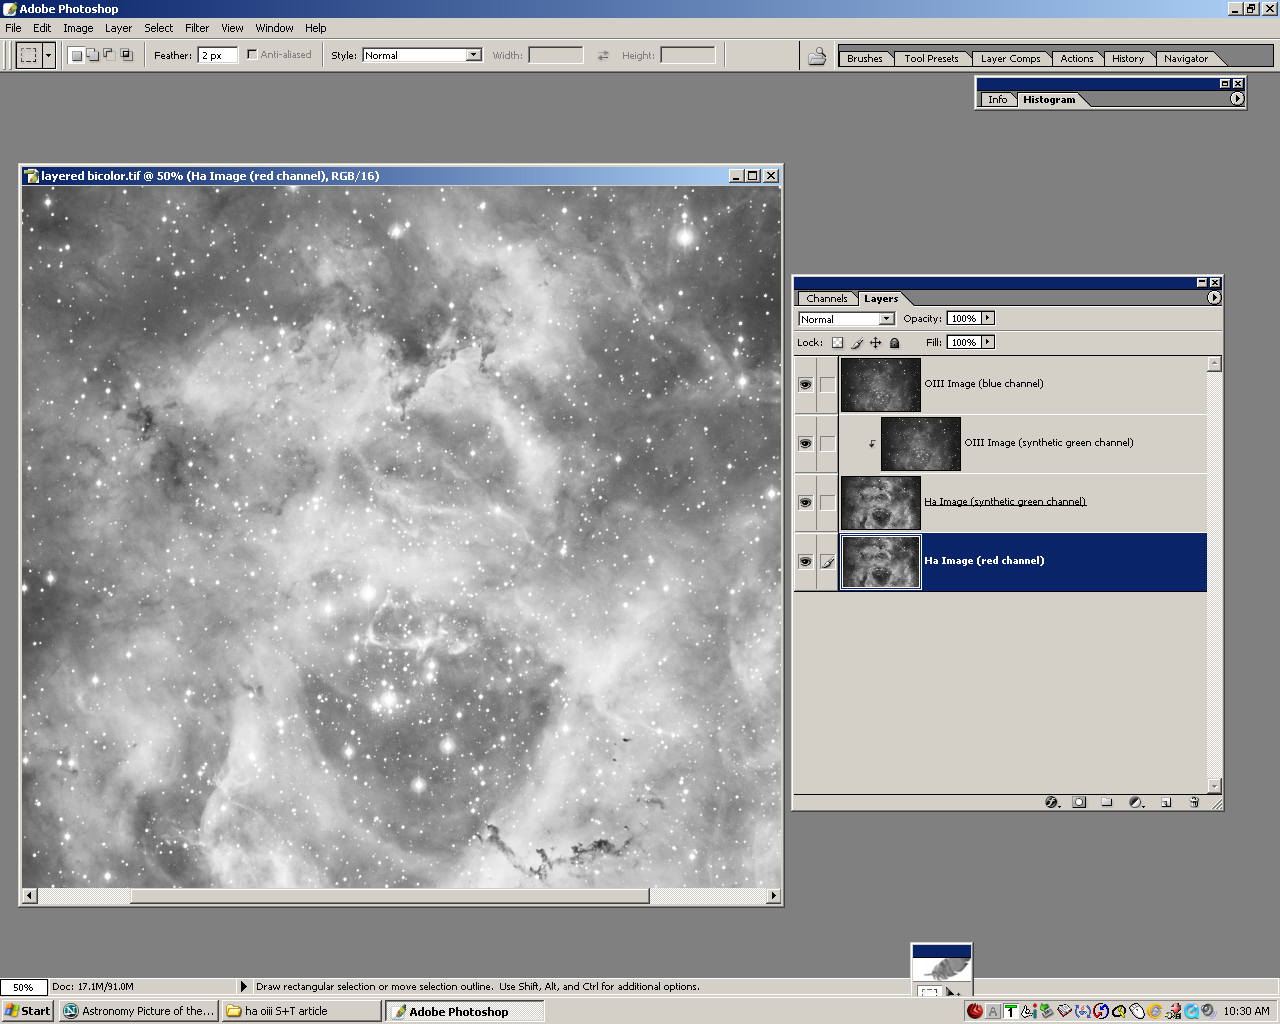
4. Duplicate
the Ha and OIII
layers
in anticipation of creating the synthetic green channel. Label as indicated.
5. IMPORTANT-
Assign "SCREEN" blend mode to the top layer (OIII
Image blue
channel);
assign "MULTIPLY" blend mode to the second layer (OIII Image synthetic
green);
assign
"SCREEN" blend mode to the third layer (Ha Image synthetic
green). Bottom layer (Ha Image red channel) remains in
"NORMAL" blend mode.
6. Create a
clipping mask using the OIII image
(synthetic
green) layer (i.e., click on this layer, then go
to "Layer, Create
Clipping Mask").
7. We will now
assign an adjustment layer to each color group, in order
to colorize them.
8. First,
click on the "Ha Image (red
channel)" layer, then go to "Layers, New Adjustment Layer,
Hue/Saturation". Be sure to assign this as a clipping mask.
Label
this layer "Hue/Saturation
(red)." Don't
adjust it
now- we will do this shortly.
9.
Next, click on the "OIII Image
(synthetic
green)" layer, then go to "Layers, New Adjustment
Layer, Hue/Saturation". Be sure to assign this as a clipping
mask. Label this layer "Hue/Saturation
(green)." Don't
adjust it
now- we will do this shortly.
10. Finally, click on the
"OIII Image
(blue channel)" layer, then
go to "Layers, New Adjustment Layer, Hue/Saturation". Be sure to
assign this as a clipping mask. Label
this layer "Hue/Saturation (blue)." Don't
adjust it
now- we will do this shortly.
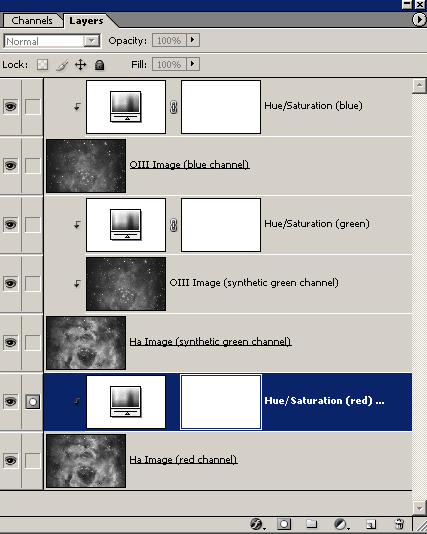
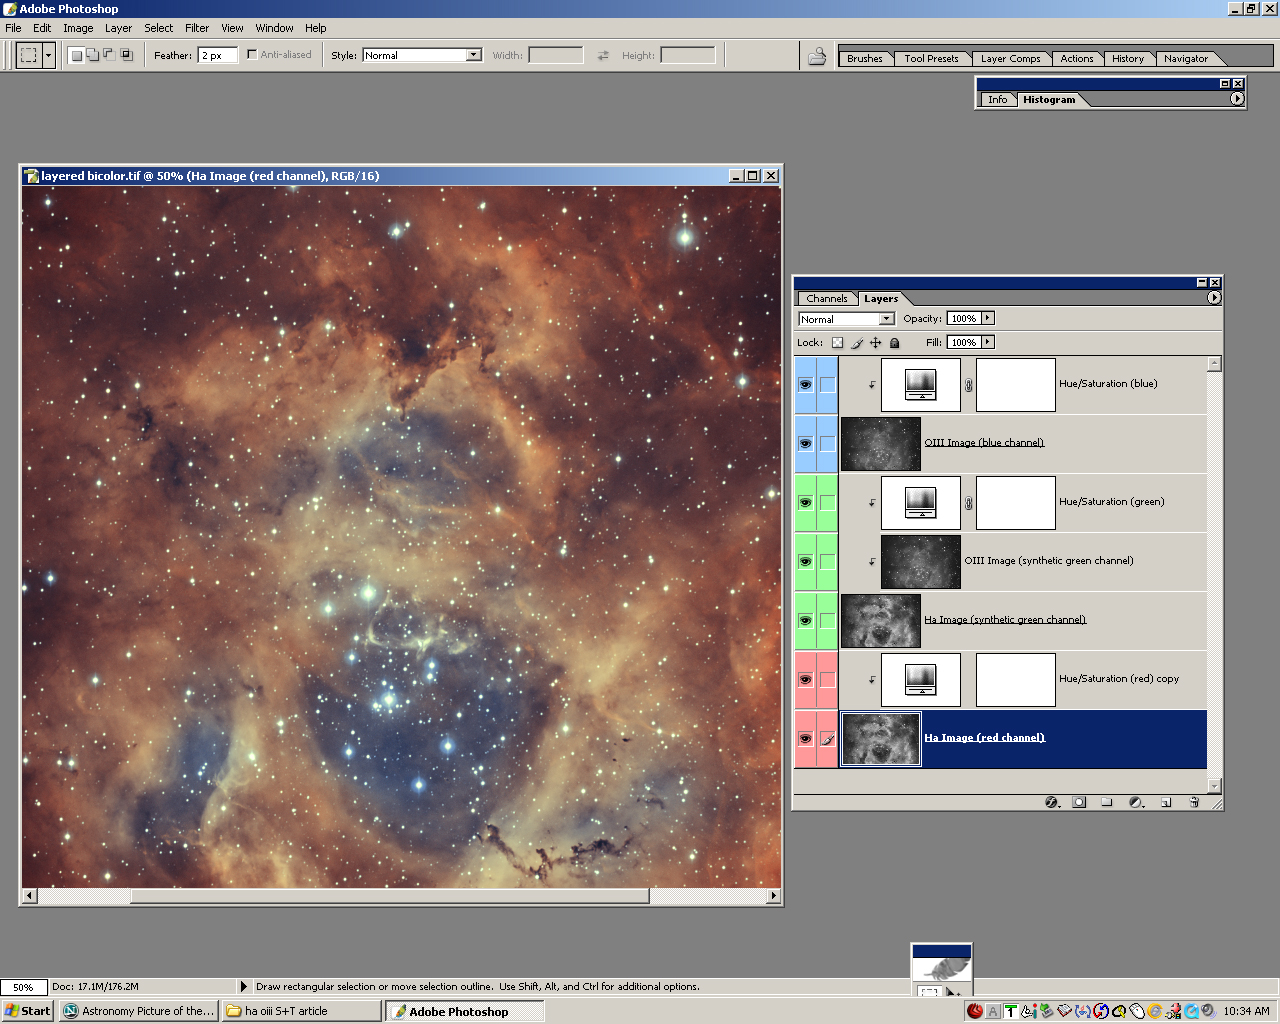
11. At this point,
here's how the
layers
should look. Now we are ready to colorize each
channel as follows:
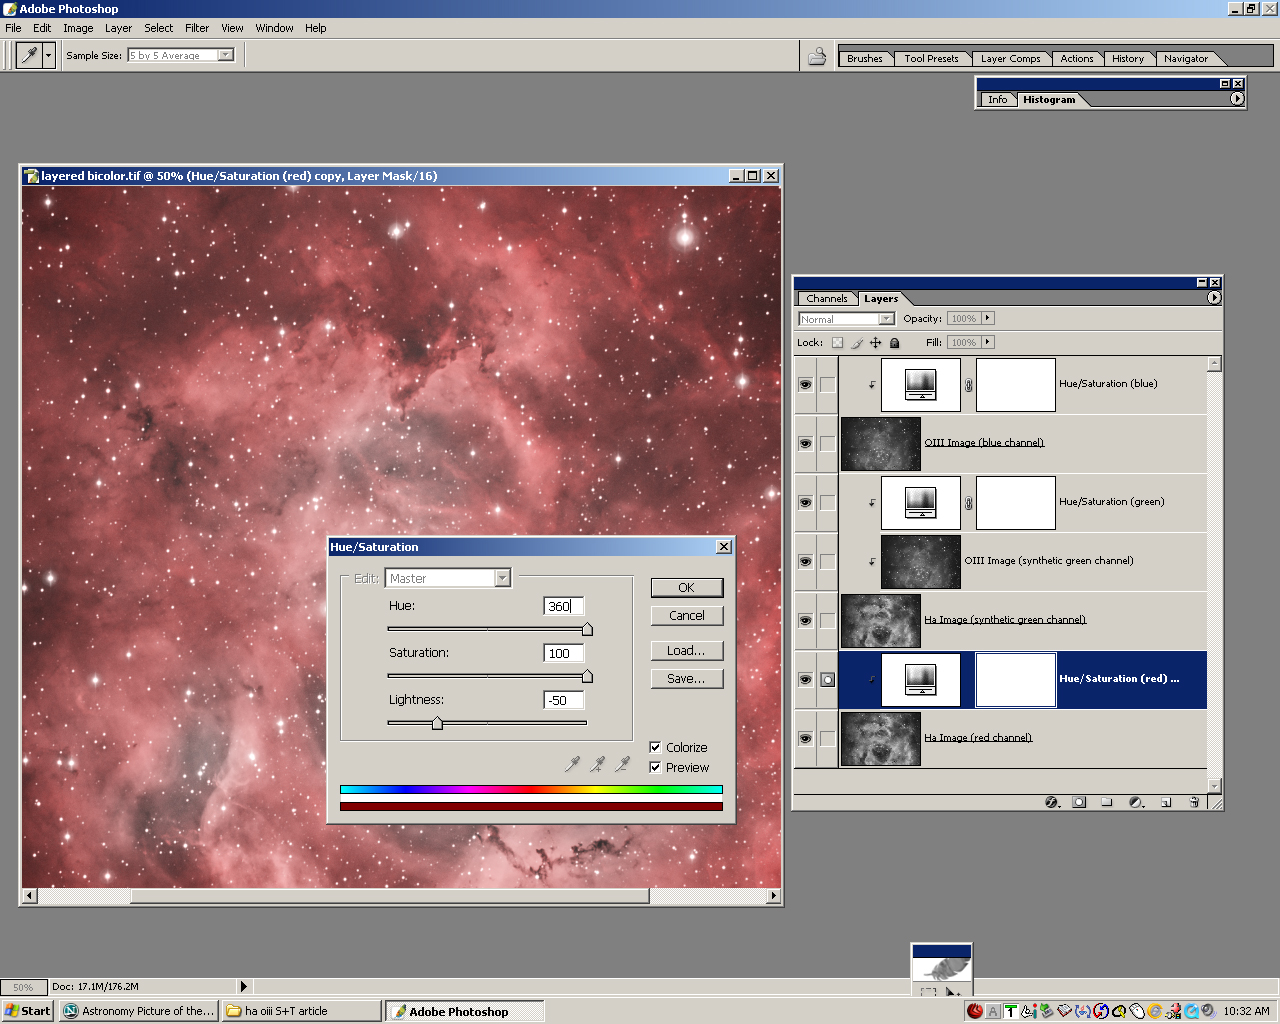
A) Open the "Hue/Saturation (red)" layer:
Click "colorize"
box,
set
hue to 360 (or zero), saturation to 100%, lighten to -50 (just a starting
point, see #12). Here's how it might look
as you adjust the sliders for the Ha layer.
B) Open the "Hue/Saturation (green)" layer: Click "colorize"
box, set hue to 120, saturation to 100%, lighten to -20 (just a starting
point, see #12).
C)
Open
the "Hue/Saturation (blue)" layer: Click
"colorize" box, set hue to
240, saturation to 100%, lighten to -40 (just a
starting point, see #12). Here's how it might look
when you have adjusted each of the three Hue/Saturation layers.
12. At this point, it's important to look at the
histogram for
each channel to determine whether the highlights are clipped. If
you have clipping in a given channel, simply open the "Hue/Saturation"
layer for that channel and reduce the intensity of the lighten slider until the
clipping disappears (do this as you watch the real-time histogram for
that channel). Repeat this for the other two channels as
needed. This is a very important step.
13. You may also
notice that the
black points of the histograms for each channel might not line
up. This needs to be corrected, since you want each channel to
start at the same place. Simply apply a "Levels" adjustment layer
to the image (i.e., place it on top of the other layers), and adjust
the black point of each channel so that it is moved to the beginning of
the histogram rise.
14. Finally, I
find it useful to apply a "Selective Color"
adjustment layer to the image so that you can adjust the red, magental,
blue, and cyan to taste.
Have fun!
Steve
Home