title
Image Processing Tutorial- Page 1

All Images
Copyright Steve Cannistra


Background:
Please note- I wrote this simple tutorial several years ago, when I was interested in DSLR astrophotography with the Canon 10D.  Although I exclusively do CCD astrophotography now, many of the principles involved in image processing have remained the same, so I've decided to keep this tutorial on my website in case anyone might benefit.


Step 1- The Raw Image:
All of my Canon 10D work involves acquiring and processing Raw Format files.  Much of what I show is based upon the use of Photoshop, although the basic principles could be followed using alternative image processing programs such as ImagesPlus.  For this tutorial, I will use one of my previous images of M45 (details provided in the image below).  This image was acquired, raw converted, dark frame calibrated, aligned, and stacked using standard techniques.  Please refer to Mike Unsold's excellent video tutorials for ImagesPlus (or check with other websites) for details regarding these initial steps in image processing.  Below is a typical stacked result that will serve as a starting point for our image processing tutorial. You may wish to download this file for practice after you have finished with the tutorial, although the quality is compromised due to the need for size reduction and jpg compression:

(Please click on image for a higher resolution view)
stacked image, pre-processing

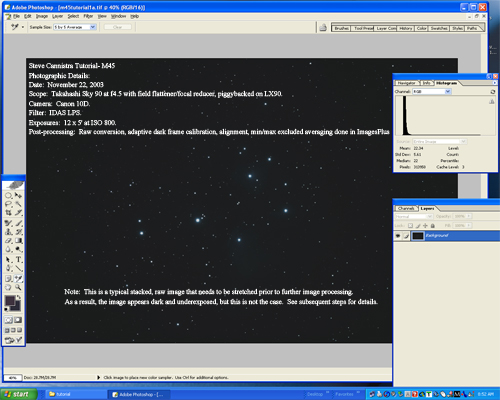
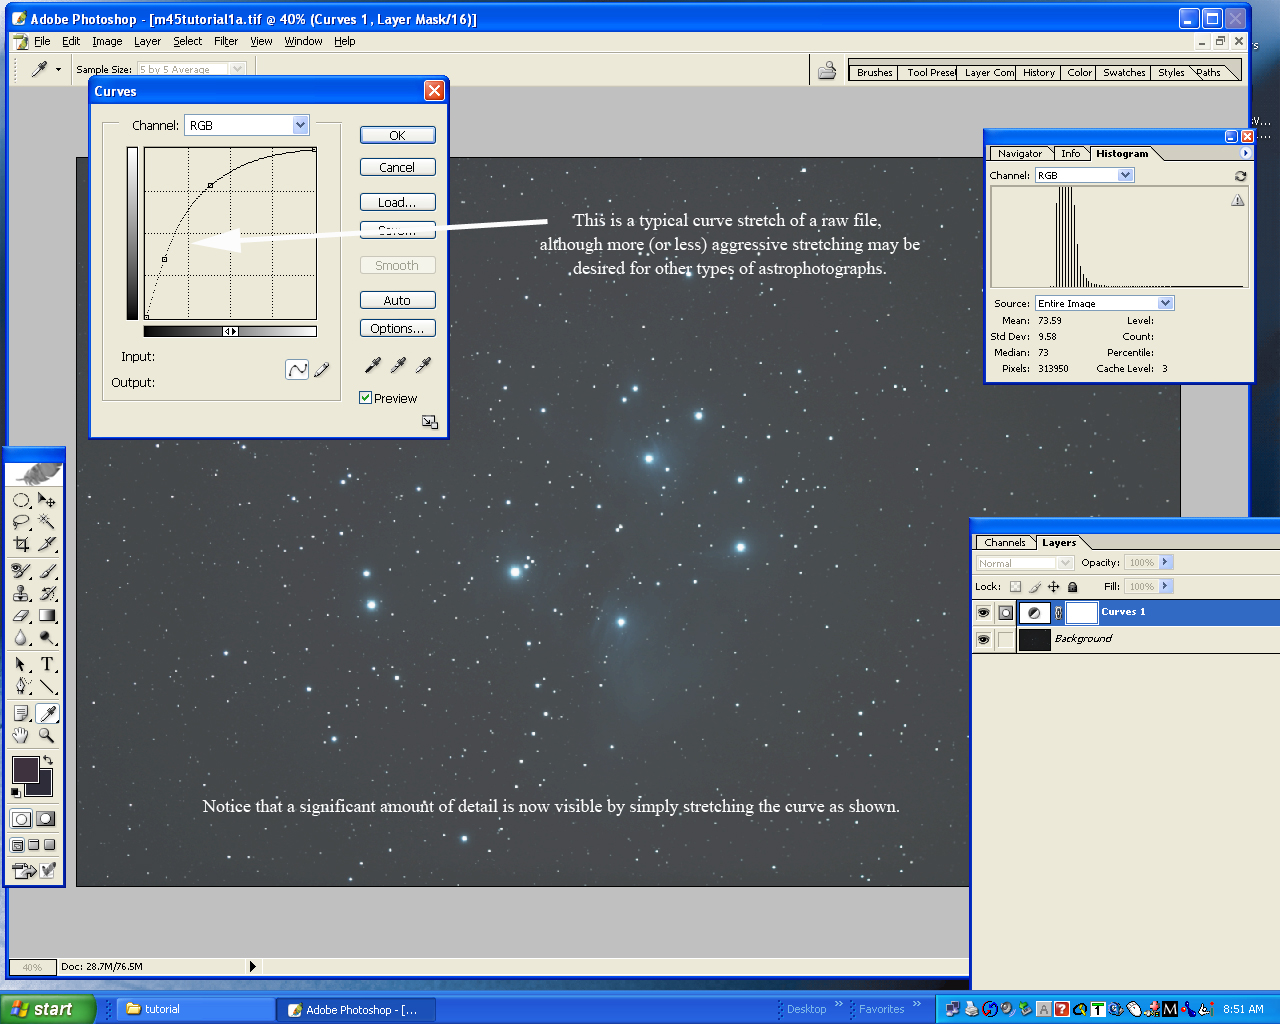
Notice that the image is dark, which is typical for raw converted Canon files (since they are derived from a linear relationship between channel number and channel intensity).  In order to transform the image into something that we are familiar with, the curves function must be made non-linear (i.e., stretched, shown in step 2) as a first step in processing.  With a keen eye, however, you will notice that this photo will turn out very well- the stars are pinpoint, and there is a fair amount of nebulosity already visible (click on this and all other images for a higher resolution view).


Step 2- Stretching the Raw Image:
The use of the Curves function is an indispensible part of processing astrophotos, and it will be used to stretch the original "Raw" format Canon 10D file in this step.  This step is not necessary if you are starting with jpg format files that have already been stretched by internal digital camera software.  However, the use of Canon "Raw" format with the 10D or 300D is highly recommended over the jpg format, since it permits capturing the data in 12 bit mode, without internal image processing by the camera (like stretching or noise reduction) that could lead to artifacts or loss of resolution.  (Note: If you are using Photoshop Elements, you will notice that it unfortunately does not contain a Curves function.  However, there is third party software available called "Hidden Elements" that permits the use of Curves as well as other functions with Photoshop Elements).


(Please click on image for a higher resolution view)
Initial curves stretch

Steps:
1.  Open the Curves window- Go to "Layers, New Adjustment Layer, Curves".  I am using Photoshop CS, but this sequence should be similar for recent versions of Photoshop.

2.  Adjust the curves similar to what is shown.  You will notice that the background brightens, and that a significant amount of nebulosity can be seen.  This faint nebulosity is contained within the left hand portion of the x-axis of the Curves graph, or the left hand portion of the histogram.  This region must not be clipped. Also notice that the histogram has shifted to the right as a result of stretching the pixel intensity distribution.  This will be corrected in step 4.


Step 3- Correction of Vignetting (next page):


Please note
:  Graphics on this website may not be reproduced without author permission.


Back to Astrophotography Page

Home