The Sun in Hydrogen Alpha, July 31, 2004
Introduction:
This is my first solar image through the Coronado
Personal Solar Telescope (PST), using the Canon 10D with an afocal
camera adapter from Orion Telescope. This scope permits wonderful
views of both prominences and surface detail, through the use of an
adjustable tuner. Note that the Coronado PST is specially made
for safe solar observing. You should NEVER use a regular
telescope for this purpose, unless you have the appropriate kind of solar filter
(note that the common type of Ha filter used for deep sky
astrophotography CANNOT be used for solar observing).
Failure to use the proper
equipment for solar viewing can lead to permanent eye damage.
Description:
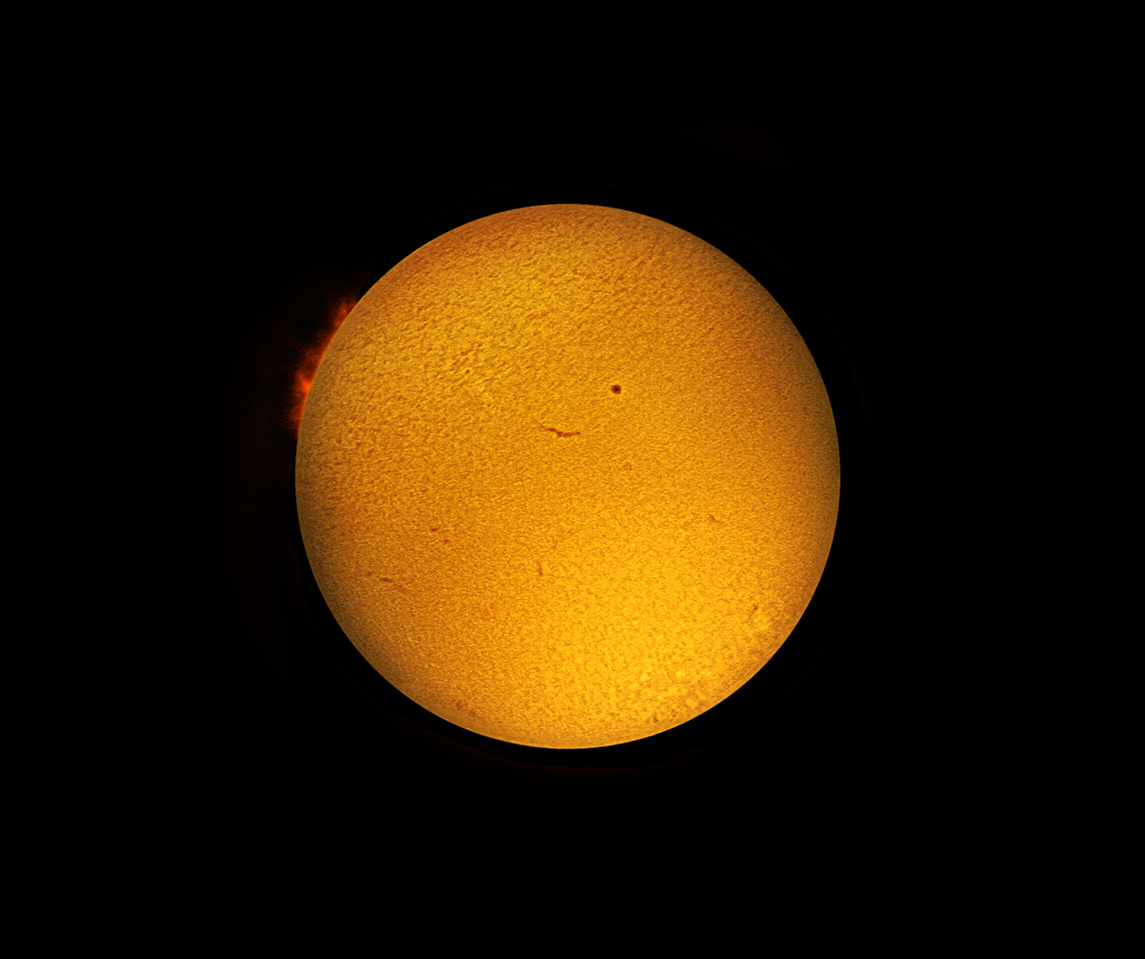
There is a large solar prominence in
the upper left that is associated with two large solar spots known as
0682, which are now on the far side of the sun (no longer
visible). Visually, I detected small prominences on the
other limb as well, although I evidently did not "catch" them at the
right point in my tuner adjustment. A sunspot is clearly visible,
located just upper right of center, and there are a few solar filaments
seen on the sun's surface (the linear red streaks). Filaments are
the same structures as prominences, except that they are seen against
the background of the Sun's chromosphere and appear dark because they
absorb the background light. When they swing around to the edge,
they appear as fiery plumes shooting into space (and are then called
prominences). Here is a good
website for those interested in learning more about the Sun.
Photographic Details:
Date: July 31, 2004
Scope: Coronado PST.
Mount: Portable motorized
equatorial mount from Orion (light weight, relatively inexpensive, and
easy to set up).
Camera: Canon 10D, in afocal configuration, using a Meade 26mm
Plossel eyepiece and the Canon 24-85mm zoom lens set to about 40mm
focal length. I focused the PST using a homemade Hartman mask and
focused the camera to infinity, tweaking the focus by taking several
shots and adjusting as necessary. For some early test shots, I
had a UV filter in place to protect the camera lens, but soon found out
that this caused a Newton's Ring effect that completely disappeared
when I removed this filter.
Exposures: A total of 100 exposures were taken in Raw
mode, at 1/125 second f5.6 for surface detail, and at 1/60 second f5.6
for prominences. I adjusted the tuner on the PST intermittently
throughout the exposures in order to capture surface detail as well as
prominences (but not in the same image). From these 100 shots, I
eventually chose one image for surface detail, and one image for
prominence detail (see below).
Conditions: Temperature 80 degrees F; average seeing;
humid; many passing clouds.
Post-processing: I used the technique described on Paul Hyndman's website, as well
as in the July 2004 issue of Sky and Telescope. The basic idea is
to select two images, one that is properly exposed for surface detail,
and the other for prominence detail. The grayscale red channel is
used for all processing steps (there is very little leakage of signal
into the green and blue channels in the 10D). The red channel is
enhanced using curves and Lucy-Richardson deconvolution in ImagesPlus,
and the two images (prominence and surface) are recombined in
Photoshop. The Channel Mixer tool (Photoshop layers) or
equivalent is used to produce a false color image as shown above.
Please
note: Graphics on this website
may not be reproduced without author permission.
Back to Hydrogen Alpha
Home